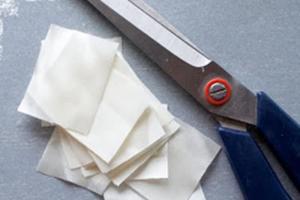
Silicone is a plastic, very soft material. It is used to obtain forms. This is a simple process, and it is also easy to make a similar composition yourself. First, it is important to study in detail the instructions on how to make a mold from silicone sealant at home.
Mixing the composition
This material is used in almost every area of human life - for household purposes, in construction, manufacturing, medicine. Silicone has earned popularity due to its characteristics that are not available in analogues. The substance helps reduce or increase adhesion processes and add hydrophobicity to the object.
The substance retains its basic properties even in extreme conditions - at high, low temperatures, and high humidity. The following qualities of the material should also be noted:
- bioinertness;
- good elasticity;
- long operating time;
- environmental friendliness.
In industry, liquids and silicone emulsions are good anti-adhesive lubricants, which are used for large-sized molds, the manufacture of lubricants, cooling, shock-absorbing compounds, and sealants. Silicone defoamers are very popular.
Silicone is used to create bushings, gaskets, rings, cuffs, plugs, as well as other special parts that can be used at temperatures from minus 60 to plus 200 degrees.
Another quality is resistance to:
- radiation;
- sea water;
- sun rays;
- alcohol;
- alkalis, acids;
- boiling water;
- mineral oils;
- electrical discharges.
Silicones are available for sale in a wide range, but some craftsmen prefer to prepare them themselves. This allows you to cut costs and express your creativity.
Making your own silicone can be done using several methods. But the resulting substance is not identical in properties to the purchased one. Homemade mixtures are inferior in quality to factory samples, and can only be used at home.
Before you start creating silicone, you will need to prepare a container for subsequent work. The assembly box will simplify the process of removing the part. There should be no gaps in the container because the substance can leak into them.
Before placing the composition in a container, it is coated with a separator - a soap or greasy solution. If a matrix is required for a vertical product, it is first attached to the bottom of the container using plasticine. Then the substance is poured around. The material must be poured in a thin stream until it completely covers the figure. Then the container is hermetically sealed, you need to wait 15 minutes. As a result, the container is disassembled, and the silicone should no longer stick to your hands.
 Creating a Matrix
 The composition of the filling substance includes:
- hardener;
- silicone paste.
This composition makes it possible to cast any shape. But the result is not exactly silicone, but something resembling rubber.
Precautionary measures
It is important to approach the form creation process correctly. It is required to carry out all manipulations with rubber gloves. Silicone is a toxic substance, so you should also think about where to carry out the work. It is advisable to do this in a room with good air circulation - optimally on a balcony, loggia, or outside.
Necessary materials
To mix yourself you will need:
- White Spirit;
- spoon, pipette, plastic cup;
- acrylic paint;
- glycerin solution;
- silicone sealant.
All of these ingredients are combined in certain proportions - it is important to strictly follow them:
- 30 g silicone;
- 150 g white spirit;
- 1 drop of coloring composition;
- 3 drops of glycerin.
The process of mixing components
When creating homemade silicone, the process includes the following steps:
- The sealant is placed in a plastic cup.
- Glycerin and paint are added to it. If you don't have a pipette, you can use a straw.
- White spirit is added.
- The solution is stirred until a homogeneous structure is achieved.
- Approximately 5 hours remain until it hardens.
Casting the mold
By mixing these components in the correct ratio, you get an interesting composition that will allow you to distinguish any forms. The catalyst will prevent the mixture from hardening too quickly.
The process of copying the required shape onto silicone is also carried out in several stages:
- Take a container that does not have small holes or crevices.
- Place a model of a mold made of plaster or plastic in a container.
- Fill the box with the attached model with sand to calculate how many milliliters of silicone are needed.
- Treat the model with a soap-based solution or oil, only then pour in the silicone mixture.
- Prepare a sealed lid for the box in advance.
- Wait about 15 minutes.
- Disassemble the container and check that the material stops sticking to your hands.
 Casting
 Now, thanks to the presence of a silicone mold, you can repeat the model as much as you like.
Using sealant
The easiest way to make a mold is to use silicone-based sealant. Experts say this is not the best choice, but sometimes it is irreplaceable. Among the advantages, one can especially highlight its universal availability of sealant. But it is important to note the disadvantages:
- rapid loss of shape;
- the composition is inconvenient to apply due to its strong stickiness in its pure form;
- long drying time;
- the need to work only in thin layers, and before each subsequent one, wait about a day for the previous one to dry.
The process of obtaining a mold based only on sealant takes several days. To eliminate stickiness and simplify application, the substance is diluted with potato starch. The consistency of this mixture resembles thick dough, from which it is much easier to form the necessary model.
To make any mold, a strong frame is required so that it does not deform during the pouring process. Acrylic-based sealant is not suitable for this purpose.
Conclusion
Until recently, a completely unknown silicone-based sealant turned out to be a universal and very interesting mixture that allows you to bring interesting ideas to life. The created forms are not suitable for use in cooking.
In contact with
Gypsum casting is the production of artistic and decorative products from natural, environmentally friendly material. Despite the seriousness of such a business, the organizational cycle of this business is quite simple, and all stages of production can be reproduced at home.
It is quite simple to make a product from gypsum: gypsum (alabaster), sold in any hardware store, and water flowing from the tap are mixed. The finished mixture is poured into the molds of the finished product or matrix. After the plaster has hardened, it is removed from the mold. The product is ready.
Popular directions for the production of gypsum products are all kinds of imitation stucco for the interior, plaster figurines for the home and sculptures for the garden, and other decorative elements. Indeed, high-quality and original gypsum products are very expensive, but the cost is extremely low - the price of the product is the cost of the matrix, gypsum and water. Gypsum and water are easy to obtain for anyone, therefore, the only and key point of such a business is original mold for casting plaster.
If you look at the information on the Internet, you can note that the demand for ready-made matrices is high, and the offers on the market are quite expensive. At the same time, the production of matrices, like gypsum casting, is quite simple home business.
How to make a mold for plaster casting with your own hands
There are molds made of various materials on the market. Solid plastic and fiberglass molds, for all their advantages (durability and shape retention), are difficult to produce and require fairly highly qualified molders. The main disadvantage of such forms is the limited range of gypsum products produced. This disadvantage is due to the general rigidity of the material. The use of plastic molds for plaster is becoming a thing of the past. Modern popular materials for the production of gypsum matrices are molding mixtures.
Molding mixtures - gypsum, polyurethane - are plastic, easy to use, and suitable for the production of complex gypsum products.
The main thing in the production of plaster molds is the imagination and originality of the finished product. If you plan to produce molds for decorative stone, your tile matrix must be unique and interesting to the end user, that is, gypsum products made from your matrix must be sold and liked by people.
Stages of manufacturing silicone and polyurethane molds for plaster:
- The final finished product, a stamp, is made from sculptural plasticine or other similar material that can hold its shape. For example, a stucco rosette on the ceiling.
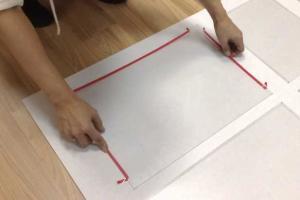
- A sealed box is made from solid material (wood, glass), taking into account the shape of the final product.
- Our stamp is placed in the finished box, cleaned of dust and dirt. The entire internal surface of the box and the product is lubricated with a release agent (special lubricant, vegetable fats or soap solution). If the figure has small and complex elements, it is first carefully processed with liquid molding mixture using a brush.
- The next step is to pour the mixture into the mold so that it completely fills all the voids in the mold.
- After waiting for the hardening time (from 5 to 20 hours), the finished matrix is removed from the box, the stamp and its remains are removed from the mold.
- The finished form is inspected for external defects. If no defects are found, the mold is usable and can be used.
How to make money using gypsum casting dies
You can sell ready-made matrices. If you are a creative person and you come up with matrices of unique products, the demand is stable and guaranteed. You also can make custom molds to order- individual moldings, stucco moldings, sculptures and other decorative elements for all kinds of studios and companies for the decoration and repair of premises and facades. The downside of such a business is that if you produce unique products, then you can independently engage in gypsum production and sell ready-made gypsum products or make them to order. The most optimal solution for such a business is to simultaneously sell final products and forms for them. This way you will cover all the demand in the market.
Approximate cost and profitability of the business
A kilogram of silicone or polyurethane molding mixture costs from 500 rubles. Sculptural plasticine - from 50 rubles. The box, your imagination and labor are priceless, so it’s difficult to take into account their cost. The cost of manufacturing a small matrix is 650...1000 rubles.
Plaster from 200 rubles per bag. Water from 20 rubles per cubic meter. The cost of a small product from a small matrix is 200 rubles.
The cost of selling finished gypsum products ranges from 700 rubles to 700 thousand (for a huge sculpture). Ready-made matrices - from 2500 rubles per piece.
Nowadays gypsum is used in almost all industrial sectors. Most often the material is used in architecture, construction and medicine. However, gypsum is also used for smaller scale activities. Some people make various figures and decorative objects from plaster. To do this, you need a special silicone mold, which can be made at home.
Features of the material
Gypsum is the most convenient material to work with, as it is easily manipulated and can take different forms. Liquid plaster allows you to make any figure. After hardening, the figure will look neat and sophisticated. When dry gypsum is combined with water, a mass is formed that can dry quickly.
In this case, the consistency of the mass resembles dough. Once hardened, gypsum can expand in size and generate heat. This allows you to repeat the shape as accurately as possible. Gypsum is also an environmentally friendly material, since only safe substances are used for its production. This makes gypsum the most popular material in some industries.
Molds for gypsum products are made of wood, plasticine, metal, and plastic. However, silicone is considered the most convenient to use, so most molds are made from this material. Such forms are now quite popular, as they allow you to create original products with minimal labor.
Silicone mold for plaster
Gypsum mortar tends to stick to the mold. Silicone prevents the risk of sticking. In this case, the product remains intact. Silicone molds allow you to create perfect products without any damage. At the same time, the form itself can be used many times, as it is elastic and wear-resistant.

There is no need to lubricate the mold before making the product, as the mold can be removed very easily without sticking to the surface. This greatly simplifies the process of creating a unique product.
How to make a silicone mold?
You can make a silicone mold yourself. In this case, you will be able to create an original product according to your own design. There is a certain technology that should be followed when creating a silicone mold.
First, a container for pouring silicone is created. The container can be made of chipboard, wood or any other material. You can use a ready-made container. Afterwards, the forms are carefully glued together so that there are no gaps or openings left. After this, you should use sculptural plasticine.
The plasticine is laid out to the middle of the container. In this case, the entire surface should be as even and smooth as possible, so this stage requires the greatest care. A model is placed in plasticine under which the mold is made.
There should be small holes in the plasticine so that parts of the mold do not move during casting. Next, the required amount of silicone is measured. The surface of the model is lubricated with wax lubricant. After pouring, the top of the mold should harden.
Next, the plasticine is removed. Care must be taken to ensure that the silicone mold is not damaged. Next, the surface of the mold is again lubricated and filled with silicone to create the upper part. When everything has hardened, the silicone mold is ready.
Silicone is a high-quality material for creating flexible injection molds. Technology for making silicone molds yourself
How to make your own molds from silicone and how to make your own products from epoxy resin
Silicone hardens without shrinking at room temperature and forms silicone rubber. Two-component liquid silicone for mold making, silicone molds are suitable for epoxy resin casting production. How to make your own silicone mold for casting an epoxy resin product at home. How to make a mold for plaster or for casting epoxy resin from poured molding silicone at home without having any experience in making molds.
Technology for self-production of silicone molds from elastic two-component silicone.
Making silicone molds at home and then pouring epoxy into a silicone mold. In this topic, the production of silicone molds for making products from epoxy resin, we will try to master the simplest technology for independent production of silicone molds for pouring epoxy products. Two-component silicone is used for casting molds and making impressions. I offer you a free master class on making products from epoxy resin. Technology for making silicone molds and methods for making products from epoxy resin.
All about raw materials for self-production of molds at home.
How to choose a material for making molds and castings from gypsum, concrete, polymer concrete, polymer resins. In addition, the production of molds and sculptures can become an independent profitable business. How to choose a material for making an elastic mold for castings from plaster or other materials. Casting in silicone molds using the example of making a simple product from epoxy resin.
Silicone compounds and rubbers are easily processed into molds even at home and do not require any additional equipment, as they can be poured by hand. After carefully reading the step-by-step instructions, you can easily make injection molds from silicone yourself. The same molds, made on your own, will cost about half as much as you can buy them, in addition, you will be able to make any mold yourself and will not depend on mold manufacturers and on the assortment that mold manufacturers offer you, and you will be able to make the assortment of molds yourself for products that are not on the market, so you will have absolutely no competition in your assortment.
Copying products, making your own mold from silicone and pouring epoxy resin into a mold is something that you can do yourself at home or in an industrial environment by carefully studying my step-by-step lesson on making silicone molds and mastering the methods and technology of pouring epoxy resin.
The technique presented to your attention is a detailed description of this technology for copying products.
Action 1. As an example, consider copying a simple product. We will cast this part from epoxy resin into a detachable silicone mold consisting of two parts.
Step 2. To apply the described technology for making silicone molds, we will need the following materials: two-component silicone for self-production of the mold and epoxy resin for pouring into the mold for making the product.
Action 3. Silicone. This is the material from which the casting mold will be made. Although common and inexpensive silicone sealant is quite suitable for this purpose, it is much easier and more convenient to use two-component silicone, specifically designed for making molds. In the example below, we will use just such silicone from Pentasil; any other two-component potting silicone will do.
Action 4. Epoxy resin. There are a great variety of such resins on the market, and most likely many of them will be suitable for our casting. The main requirement for the resin is that the polymerization time should not be too short. In particular, I focused on a product called Finishing Resin for our product example. This resin after polymerization is quite elastic, and its physical properties resemble polyurethane resin.
Action 5. Release agent. If the mold material is two-component silicone or two-component polyurethane, a separating layer will only be needed to separate the halves of the mold. There are many release products specifically designed for this purpose, usually in the form of a wax-based aerosol, but if you do not yet have the opportunity to find such a release, regular Vaseline or melted candle wax will work just fine.
Action 6. Plasticine. It will serve us as the main building material. Before you start making the mold, you should check the selected materials for consistency with each other. If you neglect this stage, you may not only not receive a copy, but also lose the original. First, make sure that the silicone you choose, once cured, can be easily removed from a surface made of the same material as the part being copied. If this is not the case, the part to be copied will have to be coated with a release layer, or a different silicone should be used. Second, make sure that the cured epoxy resin releases well from the silicone and that you are satisfied with the physical properties of the cured resin.
Step 7. Making silicone molds. To begin, apply an even layer of plasticine onto a flat, solid base (I use a CD for this purpose) and lightly press the part to be copied into it.
Action 8. If the part is relatively flat, it can be pressed into the plasticine to the level where the border of half of the future form passes. In the case of a more voluminous part, instead of pressing the part to its full depth, we will apply another layer of plasticine around the perimeter of the part.
Step 9. After this, you need to walk around the perimeter of the part and press the plasticine against its wall, thus forming a clear boundary. To do this, I use improvised devices made from matches and toothpicks coated with silicone sealant. Since plasticine does not stick to silicone at all, it is very convenient to process it with this particular material. Please note that on the future casting, a small seam will form at the place where the mold halves meet, so the location of the border must be chosen in such a way that this seam can be removed without damaging the parts around it.
Step 10. It is important to make sure that the plasticine fits tightly to the part being copied, so that the silicone cannot leak under it when casting the mold.
Step 11. Now we will make the walls of the future container, for which the easiest way is to use the same plasticine. The distance between the wall and the part should be 5-7 mm, and by the same amount the wall should exceed the highest point of the part being copied. The junction of the wall and the floor of the container is leveled using the same devices coated with silicone.
Step 12. After this, it’s worth making several small depressions in the floor of our container. They will serve as locks to prevent the halves of the future form from moving.
Step 13. So, the container is ready to fill with silicone. The silicone we are currently working with to create our product consists of two components: a thick white mass, reminiscent of condensed milk in consistency, and a dark blue liquid catalyst; there are catalysts of different colors, which must be mixed in a ratio of 10:1 (in the instructions not specified by weight or volume; I use scales for dosage). The bright color of the catalyst helps to ensure complete mixing of the components - the finished mixture should have an absolutely uniform blue color. Avoid contact of silicone and especially catalyst with skin. It is advisable to work with gloves (this, by the way, also applies to epoxy resin).
Step 14. Pour the resulting mixture into a plasticine container with the part to be copied. This should be done slowly, in a thin stream, and try to pour the silicone into the far corner of the container, and not onto the part, so that the silicone flows around it gradually, from below, without forming voids and the air has time to come out, otherwise it will end up in the form of a hole. There is no need to rush - this silicone remains fluid for almost an hour, but we must remember that silicones generally have fluidity, that is, a lifetime of 10 minutes. Once pouring is complete, the container should be left alone until the silicone has completely cured.
Step 15. After the silicone has hardened, remove all the plasticine. This must be done very carefully, so that the copied part remains in the silicone, from which it is very easily separated. First, carefully remove the side walls, then remove the floor.
Step 16. As a result, we have the finished first half of the form with the copied part in it. If there are traces of plasticine left on the form or part, they must be carefully removed, again not allowing the part to separate from the silicone.
Step 17. Place the finished half on the same disk and build plasticine walls around it, the height of which is 5 mm higher than the highest point of the part.
Step 18. Using the method and tools described above, we will achieve a more or less airtight joint between the mold and the plasticine walls (this is not so easy, because plasticine reluctantly sticks to the silicone mold, but absolute tightness is not so important here).
Step 19. Be sure to cover the surface of the first half of the mold with a separating layer of Vaseline, or apply a separator or paraffin in order to prevent the halves of the mold from sticking together (the silicone sticks tightly to itself). To do this, you can use a brush, applying a very thin layer of Vaseline, and only on the silicone, and not on the part to be copied.
Step 20. The container for the second half of the mold is ready. Preparation and pouring of silicone is carried out in the same way as for the first half. All you have to do is be patient.
Step 21. After the silicone has cured, remove the mold from the disk and remove the plasticine walls.
Step 22. Now we have to separate the two halves of the finished silicone mold. Despite the separating layer, the halves may be stuck together at some points, so some force will be required to separate them. It is important not to damage the copied part located inside.
Step 23. So, our self-made mold from two-component silicone is ready!
Action 24.Casting a part from epoxy resin
First, let's prepare the epoxy resin. The components of epoxy resin are usually mixed in a 1:1 ratio, and it is advisable to adhere to this ratio as closely as possible. For resin, at least the one we took for production training, scales are not suitable; the components have different densities, so it is better to use special measuring cups. Lately I've been adding a third ingredient to the resin: a small drop of a special coloring pigment (a mixture of black and white). In this case, the casting is not translucent, but has a more familiar gray color.
Step 25. Mix the epoxy resin thoroughly, not only in the center, but also along the edges of the container, but at the same time carefully, trying to introduce as few air bubbles as possible. Alas, the formation of these air bubbles is almost inevitable, while they cannot be tolerated; where the bubble is close to the surface of the part, a hole is formed in the product. There are several ways to combat bubbles using vacuum and high pressure, but we will use a simpler method. The resin, already mixed in the tank, should be heated, for which an ordinary hair dryer is suitable. After heating the resin, it should be left for a couple of minutes, during which time most of the bubbles will come out. Please take a look at the following photos. On the first resin, immediately after heating, bubbles rapidly rise to the surface. In the second photo most of the bubbles have come out.
Step 26. Of course, this method is only applicable to resins with a long polymerization time. The fast-setting epoxy resin that experienced manufacturers work with will most likely harden before we have time to complete all these manipulations, especially since heat accelerates polymerization. Now apply the resin to both halves of the silicone mold. For this I usually use a toothpick or a match. The resin is laid out on the silicone surface in a thin layer, and again you need to try not to introduce bubbles or create voids.
Step 27: Epoxy resin is applied to each half of the mold with a slight excess of crust. At this stage, you can heat the resin again, already in the mold, forcing most of the remaining bubbles to come out and making it thinner, which will reduce the thickness of the future flash.
Step 28. Put the halves of the form together. In this case, the excess resin will simply be squeezed out. Sometimes it is recommended to provide channels or cavities in the mold to drain excess resin, but I did not notice much benefit from them and eventually stopped doing them.
Action 29. Press the mold halves tightly together, for example, clamp them between two hard plates fastened with rubber rings, or place them under a load. This is important, since if the mold halves do not fit tightly, the flash will be thicker, not to mention the fact that the resin may simply leak out. On the other hand, you shouldn’t be too zealous either, since the mold is elastic, and strong compression can deform it and the future casting.
Step 30. When choosing the position in which we will leave the mold with liquid resin inside, it makes sense to take into account the following consideration. Despite our efforts to control air bubbles, one or two of the most stubborn air bubbles are likely to remain in the resin. What will happen to them next? They will most likely rise to the top and remain on the surface, creating tiny holes in the finished casting. But where the casting will have the upper hand is up to us. It makes sense to position the form so that the part on top is where the bubbles will be less noticeable, or where it will be easier to seal them.
Now all that remains is to wait. The readiness of the casting can be judged by the resin squeezed out. Take your time! If the resin has not yet fully cured, the casting may be damaged when removed from the mold. In my case, I do not touch the mold with resin for 24 hours. After this time, the halves of the mold can be carefully separated and removed
Step 31. Dried stains are carefully removed with a match or toothpick, after which the remaining minor seam can be treated with fine sandpaper.
Act 33. That's all. Our epoxy resin casting, absolutely identical to the original, is ready.
As you can see, everything is quite simple and modern, having gained experience on such small products, you will be able to produce serious products that are in demand on the market, and you will also be able to independently make silicone molds to expand your activities and expand the range, and most importantly, you will be able to make molds from silicone and not depend on that range which is offered today.
Here is an example of pouring silicone into open matrices
An example of a silicone mold and a finished product made from silicone molds. Silicone molds
Removing the silicone mold from the finished product. How to remove a silicone mold from a finished product
You can ask and discuss all questions on our forum.
Another form of mine, this time made from this kind of construction silicone. , but it was mainly intended as a one-off, since only one clone was needed. If desired, of course, you can squeeze a couple of copies out of it, protecting the plaster with all sorts of impregnations and using a variety of separating lubricants. But even with these measures, after the first use it began to break down for me.
This time we need to get about 70 copies of shells, again for this Tiger tank, so we had to abandon the plaster mold and try to use construction silicone. On the Internet they write that construction silicone can withstand about 5-8 castings from Epoxy resin (EDP), then it begins to collapse. Therefore, it is recommended to use aspic, which is capable of producing several times more copies. But something confuses me about the price of poured silicones, so I decided to buy the cheapest coating silicone for testing and, as it were, probe the process of creating molds from silicone, and then it will be clear in which direction to dig next.

To begin with, I made a bed for the silicone itself, so that the silicone would hold the desired shape when epoxy resin was poured into it. I followed almost the same scheme as when creating the mold for this radiator. An ordinary lighter was ideally suited to the size of the projectiles, so I built a plastic formwork around it.

I sculpted it in a hurry, so when pouring it there were a lot of leaks.

Actually, one half is already ready. I overfilled a little plaster, because of this the radii of the mold go into the minus and do not release the lighter, so I had to disassemble the formwork and grind off all the excess to remove the lighter.

I dug out the grooves for the locks, reassembled everything, generously lubricated it with grease so that I didn’t have to hammer anything out like the first time, and besides, the quality of the print is not required here.

Poured alabaster.


This time the halves of the mold came apart like clockwork, without even needing to knock on them.

I ground off the burrs, coated the halves with PVA glue and sent them to dry on the radiator.

Then, to be sure, I covered them with paraffin.

As a separating lubricant, ordinary shoe polish showed the best results, apparently due to the fact that it contains the same wax.

I lightly coated the projectile prototypes with this shoe polish so that the silicone itself would not stick to the projectiles.

I thoroughly coated the shells with silicone so that there were no air bubbles on them. I also filled both halves of the stock with silicone, then put the shells into the half and closed the lid, squeezing out the excess silicone. I did all this with dry hands, on the internet they write that it’s better to wet your hands, but I didn’t do this, because I didn’t want to get rid of droplets of water later. By the way, the smell is indescribable because silicone is acidic, it feels like you spilled a bottle of vinegar. So it’s better to make silicone molds with the window open or even outside.

I tightened the block with rubber bands and left it to dry for a couple of days.

Two days later I decided to take the mold apart and see what happened. At first glance, everything seems to be normal, the only thing that bothered me was the sharp acidic smell when removing the silicone mold from the plaster.


I couldn’t wait to do an autopsy, so I armed myself with piercing and cutting instruments and began the operation. As it turned out, the stench from the mold was not without reason; somewhere in the depths the knife began to get dirty on the silicone that had not dried. Therefore, the operation had to be postponed for another couple of days. But this time I put the mold in the box, but did not close it with a lid, so that it would air better and dry faster. So if you make a very thick mold, feel free to dry it for a week.

Two days later we were able to cut out the shells. I decided to cut not in the middle, but closer to the edge, so that it would form like a bowl with a lid, through which I could then fill the mold with resin. It’s hard to see in the photo here, but the silicone stuck very well to the shells in several places. Therefore, when removed, the silicone tore and remained on the shells in small pellets.
So you need to look for a different separating lubricant or apply more shoe polish. But this is a double-edged sword: if you apply a lot of lubricant, you will lose the detail of the part, and besides, it will be difficult to apply the silicone itself to the lubricant, since it is thick and will stick anywhere, but not on the part.

I lubricated the stock and at the same time the mold, mixed the resin, prepared a couple of nails for a more substantial weight of the projectiles at the exit. In theory, you can completely abandon the plaster bed because it is an extra hemorrhoid. Unless, of course, you initially create a silicone mold on something flat, so as not to end up with bananas at the end. True, there is a possibility that without a tight fit, the epoxy will flow out through the cut in the silicone mold.

I placed the mold at a slight angle so that the resin would fill the mold by gravity, inserted nails and gradually filled the mold with epoxy resin. As it was filled with resin, the mold was closed, but so that there were no air bubbles left inside.

After filling, I closed the lid and threw it on the battery. After 2-3 hours the resin had already hardened. After which I pulled the shells out of the mold, at first glance everything turned out great. A little sanding and you can paint.


As it turned out, I rejoiced early, with each subsequent casting, the shells were increasingly difficult to remove from the mold. The epoxy stuck more and more tightly to the flesh, to the point that the mold began to tear when the projectile was removed. It became just as difficult each time to clean the mold itself from resin drips. In general, closer to the seventh approach, the mold stopped closing tightly, which is why there were more and more defects in the parts. So if you need several copies of something, then you can use this method, otherwise, look for a separator or pour something less aggressive (Gypsum).
It looks like another separating lubricant is needed, and without one, the process of cloning ammunition using this method was suspended. After some time, I made just such a composite mold from epoxy resin and used it to cast plaster copies of the shells.
Afterword 1
I recently came across an interesting method for making pseudo-silicone from improvised materials (gelatin, glycerin). So, if you need to quickly take a cast of some small part and cast a copy of it in epoxy resin. Here it is. It’s difficult to pour massive parts into it, since the mold is afraid of heating (if suddenly there is an excessive reaction in the epoxy resin), but casting small things is just right.