Many people want to keep fit and exercise, but not everyone has the opportunity to visit professional fitness centers for a number of reasons. Don't be upset, because this problem can be easily resolved. In one of our articles we described, taking into account all the technical nuances. But to start classes, you need to have at least a minimum set of sports equipment.
Modern sporting goods stores offer a wide variety of exercise equipment, but their prices are very high. Therefore, many began to be interested in how to make equipment for a home gym with their own hands without spending a lot of money. This is exactly what this article will discuss.
Homemade punching bag for the home gym

A punching bag is one of the most necessary equipment that will help you practice your punching power and technique. Making it yourself is quite simple:
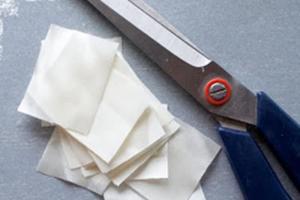
- To do this, you need to take an old fire hose and rip it apart along one of the folds;
- You should end up with a strip of tarpaulin, which must be washed and boiled so that the fabric is not too hard and does not hurt your hands;

- We measure the required length from the workpiece and sew a cylindrical bag with a diameter of up to half a meter. Inside we place another thick bag, well filled with sawdust, grain or plastic granules. It is not recommended to fill the product with sand, because it will be too hard at the bottom and soft at the top. This will create inconvenience;
- It is best to attach the finished projectile to the ceiling using a chain or rope. You can also mount the equipment on a bracket, crossbar or wall bars. When exercising outdoors, the bag is hung on a strong tree.

There is another option on how to make a punching bag at home with your own hands. You will get a so-called “pugnacious bag”, which will help train your reaction and learn to dodge a blow.
- Fill a small piece of a fire hose with unnecessary things or rags and secure it well on both sides;
- Hang the product on a thick elastic band or fasten the stretcher on two ropes. When hit, the bag will spring back.
You can also make such sports equipment with your own hands from a tarpaulin from a car cover, but it will have to be sewn together in several layers so that it does not tear.
Homemade kettlebell for the home gym

The simplest version of this equipment is a plastic canister with a comfortable handle. It can be filled with sand, gravel or small coins. You can cast the product yourself, making a metal body and lead “insides”. But you should not create a projectile entirely from lead, since this metal can cause harm to the skin if it comes into contact.
There are a couple more simple ways to make a kettlebell with your own hands:
- We put three strong bags inside each other, fill them with filler, and give the product the desired shape using tape. How it will look, look at the photo below;

- We roll up a small diameter tube into a handle shape. Make a cut in a ball with a dense shell (a basketball would be best), put large bolts and metal scraps inside, and pour in the concrete mixture. We fix the handle in it, connecting its ends to each other. Then we close the incision tightly. The disadvantage of such a weight is that it will be difficult to calculate its exact weight.
DIY dumbbells and barbell made from plastic bottles
Dumbbells are one of the most common sports equipment that can be used in a variety of exercises. They can be easily made from scrap materials. The easiest option is to use plastic bottles.

Instructions on how to make dumbbells with your own hands:
- To assemble one pair of shells you will need 4 bottles. Their middle part is cut out, and the top and bottom are fastened together with electrical tape;
- Filler, for example, a mixture of cement and sand, is loaded into the resulting containers. To increase the weight, you need to place metal elements (bearings, nails, small scrap metal) in the filler;
- Next, the two parts of the bottles are connected to each other by a tube or a strong wooden stick, which must be inserted into the necks;
- The joints and the resulting handle are wrapped with tape or tape.
Before starting training, check all joints again to ensure that the filling material does not “leak” out.

Plastic bottles can also be used to create a barbell. Since the design involves more weight than dumbbells, more material will be needed.
A simple diagram of how to make a barbell with your own hands:
- We take at least 8 whole plastic bottles and fill them with filler. The weight of each element should be the same so that there is no skewing to the sides during exercises;
- As a neck we use reinforcement (wrapped with tape) or a pipe that fits comfortably in our hands;
- We place the finished weights evenly at each end of the bar and tighten them tightly with electrical tape. There should be 4 filled bottles on each side. Be sure to check the tightness of the connection and do not spare the electrical tape if the neck moves out;
- To increase the weight of the projectile, additional weights can be placed on top of the bottles, for example, from wooden blocks, also taped to the main weights.
You can increase the weight on such a barbell up to 100 kg. To make it easier to calculate how much homemade equipment will weigh, use the following data:

Weight of a 2 liter plastic bottle (in kg):
- With water – 1.997;
- With crushed stone (sandstone) – 2,600;
- With compacted sand – 3.360;
- With wet sand – 3.840;
- With lead – 22,800.
DIY barbell bench
Almost all sports equipment can be used as separate units without additional equipment. And to work with a barbell, you definitely need a special bench for bench press. To make it, you need to have skills in working with metal.
To create a metal base you will need:
- Drill;
- Bulgarian;
- Profile pipe with a cross section of 40x40 mm;
- Roulette;
- Vise;
- Steel strip (length 140 mm, width 40 mm);
- Welding machine.

Making a bench for a barbell:
- We cut 2 pieces of pipe, each 830 mm long. They will be used to support the barbell, so they need to be as strong as possible. From the bottom of each product, 340 mm is measured and a mark is made with a simple pencil;
- We install two pipes at a distance of 520 mm from each other and at a height of 340 mm (this is how much you need to retreat from the weld to the base). The weld must be made taking into account the fact that it will be subject to a load of over 100 kg;
- The bench support element will have a length of 970 mm. It will combine the structure with the rear and front supports (it is placed on top of the rear one, and attached to the side by welding at the front);
- A 340 mm leg is embedded on the reverse side;
- To evenly distribute the load on the floor plane, an extension of 220 mm is made under the front legs, and 300 mm under the rear legs. The joints are well welded;
- From a steel strip in a vice, 2 supports are bent in the form of the letter “J” of the same length. Their rear protrusion should be high (7-8 cm), and the front, on the contrary, should be small.
The structure must also have holes with a diameter of 1 cm. They are used for the entry of rods and are located at a distance of 160 mm from the center of the beam that connects the front legs (see drawing).

- Roulette;
- Bulgarian;
- Door hinges;
- Sheet steel 2 mm;
- Welding machine;
- Reinforcing rod without ribs;
- Foam rubber;
- Rubberized fabric;
- Edged board.

Stages of work:
- We cut out steel sheets measuring 350x160 and 350x940 mm. The first one is secured with a welded seam in the leg area with a protrusion of 1 cm beyond the pipe;
- We fix the second one using a steel loop by welding one side of it to the pipe and the other to a steel plate;
- On the reverse side, 100 mm is retreated and two ribless reinforcement bars, each 300 mm long, are fixed. This will allow you to install the backrest at an angle;
- At the final stage, we lay chipboard or edged board on top so that it protrudes half a centimeter in each direction. Only at the junction of two plates, on the contrary, it is necessary to cut 1 cm.
All joints between metal and wood are carefully secured with self-tapping screws so as not to pierce the wooden surface. The structure is wrapped in foam rubber on top and wrapped in rubberized fabric with maximum density.
DIY ab roller

The ab roller is the simplest, most effective exercise tool that many people use. It's quite simple to make.
Effective ab roller exercises for beginners, men and women.
The main part for such a device is a wheel with a diameter of about 10-20 cm. This spare part from a stroller, children's bicycle or large toy is quite suitable. The second necessary part is a metal tube (you can also use a plastic pipe or a piece of wooden cutting). The length of this element is at least 30 cm, and the diameter is at least 3 cm (it should be as close as possible to the hole).

The simplest assembly method is when the tube is threaded into the hole in the wheel and secured on both sides with electrical tape. You can come up with other fastenings, for example, by putting a plastic bottle cap on each side.
There is another option on how to make an abdominal exercise machine with your own hands. This will make the design more reliable. To do this, take a metal rod with a threaded thread, thread it through the hole in the wheel and secure it with nuts. For convenience, we put two pieces of irrigation hose on it on each side.

As you can see, you can make home exercise equipment yourself, and you don’t have to buy expensive equipment that many stores offer. You just need to stock up on the necessary materials, spend a little time and effort, then you can fully equip your sports corner for comfortable and effective training.
Video: Homemade rod from plastic bottles
- Not just spirit
- What to choose from
- Special benches
- About sizes
- Various benches
- About covering boards and seats
Modern life, on the one hand, deprives a person of most natural physical activities; on the other hand, it throws bundles of psychological and emotional loads at him. Therefore, absolutely everyone needs to keep themselves in good, at least physical shape. To the credit of the current generation, we can say that now most people understand: a healthy mind in a healthy body. They also soon begin to understand: physical exercises, dumbbells and wrist expanders are not enough; you need to work more with weights on apparatus and machines, so at least a bench is required.
Not just spirit
A healthy body is also necessary for a developed mind. Physically undeveloped outstanding scientists, engineers, creative intelligentsia, top managers and businessmen are the exception rather than the rule. Leo Tolstoy at 60 was spinning the sun on a horizontal bar. Niels Bohr, the one in school textbooks, was a famous football player who played for the Danish national team. Things got funny with him: when Bohr was awarded the Nobel Prize in physics, of course, the Copenhagen Tagebladette published a note saying, it’s good, our forward was given a Nobel Prize for football. And a “nerd” in “physics” often turns out to be one in areas of activity that require mental effort.
The abdominal muscles are known to be more difficult to pump than others, because... their ends are not directly connected to the bones. At home, doing abdominal pumping without special equipment, it won’t take long before you get a hernia. Therefore, you need a bench for the press. Structurally, both apparatuses are most often combined into one, with the possibility of conversion for certain sets of exercises.
Sports benches are not technologically complex products. There are enough descriptions of them in RuNet, but more in the spirit of: choose the drawings, and then - this is how you have to saw, pound like this, screw like this. A person who cares about his physical development, as a rule, knows how to operate a tool. But how to choose a prototype so that your training benefits? How to modify it to suit your biomechanics and biometrics? Which sample is more suitable for certain groups of exercises?
This publication is devoted to the questions of how to make a bench for exercises in the preferred direction of physical development with your own hands, using a reasonably chosen model, and then, based on it, a home exercise machine. Those who intend to prove themselves in sports or bodybuilding by working out in it will not be ashamed to come to a well-equipped professional gym. In the meantime, the material is designed for beginner athletes and simply for people who understand: you can and should use the benefits of civilization, but letting them turn you into a twitchy “teapot” or a swollen kettle is wrong.
Note: The problem of home sports activities has recently become more and more acute in rural areas - “physics” is decreasing there, stress is increasing, and a well-equipped gym is sometimes far away.
What to choose from
A home bench press bench is most often included in a compact exercise machine or is itself a multifunctional sports equipment. Regular exercisers will probably end up with a simulator, so when choosing a prototype bench, you need to keep in mind what it will acquire later. The most common designs of sports simulators are 4-, 3-, and 2-support. “Support” in this case does not mean the number of points of contact with the floor (usually there are at least 4 of them, for stability), but the number of vertical force connections in the structure; it largely determines the capabilities of the projectile.
4-support projectiles, pos. 1 in Fig., are intended for developed athletes who operate with large, over 100 kg, weights. The racks for the barbell are located in them at the level of the shoulders of the person lying down, which greatly reduces the risk of injury: a barbell collapsing with the bar on the chest is very serious. 4-support exercise machines are heavy, cumbersome, and you can’t exercise with heavy weights in an apartment: falling on the floor, they give an instantaneous load of 5-8 of their weights, and the load-bearing capacity of the floors is 250 kg/sq. m.

On the trail. rice. – inclined bench for the press. Due to its compactness and usefulness, it won’t hurt to have a separate one if there is enough space in your home. Due to the absence of right angles, the material is weaker - 40x40 corrugated pipe. Footrests - 10 mm rod with threads at the ends, rubberized to the desired size. The rubber couplings are removable: the lower stop is adjustable, and the top one can be removed if you need to do exercises in which it interferes.

Next in Fig. – compact power bench with racks for barbells. Exercises on it are done mainly while sitting. You can also pump up your abs by deeply arching your back. In this case, the foot rests will be the transverse beam A, and then it needs to be covered with something soft or put on a rubber coupling. The materials are 40x40 corrugated pipe, and the rod holders are made of steel strip with a thickness of 6 mm.

The next example is an athletic bench for strong guys who can confidently handle a barbell of weight equal to their own, the so-called. Scott's desk. The materials, respectively, are corrugated pipe 60x60x2.5 and 50x50x2. The neck holders are made of the same strip as in the previous one. case; seat and table made of plywood from 20 mm.

About wooden athletic benches
You cannot train with barbells on wooden sports equipment; their design will not hold up. But in situations that arise as a result of the awkwardness of the trainee, wood “radiates” through the body much less sensitively than metal. Therefore, it is preferable for beginners and minors to use wooden benches for bench press and abs. In addition, wooden sports benches and exercise equipment can be built at the dacha or in a country house from leftover building materials.

The design of an inclined wooden bench for the press and the specifications for it are shown in Fig., and on the next. rice. – drawings of a wooden exercise machine with an inclined bench and a lever for leg exercises with a load. In order for the tree to support operational loads, a block system for hanging loads is used: they hang on the descending branches of cable A. Cross beams B are rubber-coated steel.

About covering boards and seats
The boards and seats of industrial sports equipment are covered with leatherette or plastic for a similar purpose on an elastic lining. Such covering is durable, but does not prevent the reabsorption of sweat, which is in no way beneficial; This is why modern sports uniforms are made in 2 layers, with a mesh that immediately removes sweat directly from the skin.
In gyms, this lack of cladding does not have a noticeable effect, because... the gym is equipped with supply and exhaust ventilation (PVV) and air conditioning. At the very least, it must be equipped in accordance with sanitary standards. It is not always possible to exercise at a comfortable temperature at home, and it is simply technically impossible to arrange PVV in many city apartments. Therefore, it is advisable to cover homemade athletic benches in the form of such a “pie”, following from the base outward:
- Microporous rubber with a thickness of 12 mm;
- Furniture foam rubber with density 45 (grade 45) with a thickness of 8 mm;
- Sintepon with a thickness of 7 mm;
- Denim or material like the old-style flannelette soldier's blanket.
The rubber damper is glued to the base with Moment glue or hot glue from a glue gun. The remaining layers of sheathing are folded to the underside and pinned with a furniture stapler. The disadvantage of such cladding is that it needs to be changed once a year, at the end of spring; the rubber layer remains. The soft layers will not harden, perhaps within 3-4 years, but according to sanitary and hygienic requirements, the service life of the textile lining should be reduced to a year.
In conclusion: about the technology of work
It is not the scope of this publication to describe the technological details of manufacturing benches for physical exercise. However, even if the reader is a good mechanic and welder, it is necessary to give an idea of how to make a home gym with your own hands. Therefore, we offer a video course in 3 parts from the author, who made himself a very good simulator, as they say, from scratch in every sense:
Video: do-it-yourself simulator, manufacturing
Part 1
Part 2
Part 3
Hello everyone, my name is Maxim Kachalkin, I am a participant in the do-it-yourself competition on the web welding website. I thought for a long time about what to do, there were many versions, but I settled on a multifunctional exercise machine, since in Russia sports are very expensive and it is cheaper to drink alcoholic beverages than to play sports. Many people would like to play sports, but financially they cannot afford a gym membership, and people from the outback have nowhere to go, since they don’t even have the simplest rocking chair.
Before starting to make the simulator, I decided to make it in a 3D modeling program in order to make sure whether it would work or not. I spent a long time selecting the optimal size and appearance. While working on the 3D model, I periodically changed something and tried in every way to simplify it and make it smaller.
And now I will begin the process of making the simulator itself. At the end of the description there will be a link to a video that will contain all the dimensions and drawings.
In order to make a simulator we need the following material:
- Professional pipe 40x40x2
- Professional pipe 30x30x2 or 40x40x2
- Pipe for 15
- Pipe for 20
- Pipe for 25
- Pipe for 32
- Sheet metal from 2 to 4 mm
- Bearings internal diameter 10, external diameter from 26 to 30 (as convenient for you)
- Pulleys-Dimensions will be indicated at the end of the video.
- Bolts 10
- Nuts for 10
- Clamps (clamps)
- Carbines

After I have filed all the metal, I start drilling the holes. I first drilled with a drill with a diameter of 5, then with a drill with a diameter of 10. 


Once I've drilled all the holes, I start welding. 


When the top and bottom are ready, I proceed to the racks. 

After I grabbed the entire main body, I began assembling the mechanism (butterfly). 


Next, I start making a box for pancakes. In order for the box to move through the pipes smoothly and without noise, I thought of something like seals (I don’t know what to call them correctly) made of plastic pipes. Drawings are available at the end of the video. 


After I have prepared everything I need, I start assembling. 


Next, I start making a horizontal bar for traction of the lower block, its dimensions: length before bending 800 mm, each handle 120 mm long from pipe 20. 

Then I start making removable bars. Their size: box - 500 mm by 480 mm, pipe length 500 mm, pipe diameter 25, grip width 480. The scarves are made of professional pipe 30x30x2. 


After I boiled everything, cleaned it up, I started priming and then painting. Ready option. 


I checked everything works. Watch the video, where I partially show how it works. Unfortunately, the paint was not dry at that time, but I had to shoot this video because I was leaving for a part-time job.
I tried very hard, I hope you appreciate it. I would like to say thank you to Websvarka for holding such competitions, and not for the first time. Thanks to all the sponsors of this competition and, of course, thanks to all the participants in this competition, as it was very interesting for me to compete with you. And it’s very difficult, since I’m only 19 years old and I’m not yet an expert in this matter, like you, I have something to strive for. I liked all the works, I don’t mind giving my vote for many of the works, I hope you will reciprocate. If you have any questions, write in the comments, I will definitely answer them all.
Competition work No. 17, Technical nomination
While redoing the heating system at home, I received a whole bunch of used old pipes and radiators. I found a use for them very quickly, since the idea of a simulator was already in the air. Sections of heating radiators could serve well as cargo. The weight of one section is approximately 8 kg.
To make the device, I bought only bolts, bicycle handlebar handles, a cable, a tensioner, sharpened rollers, and consumables - electrodes, cutting wheels. Everything else is “background” material.
First I assembled the cargo basket. I chose the size of the basket based on the size of the battery sections. I started the assembly with the pallet, and then the vertical racks with rollers. The cable block completes the design. After assembling the basket, I began making the frame. The frame was assembled first with bolts, and then, after adjusting the smoothness of the basket, I welded the rear pillar. The upper part of the frame is made of U profile. It is very convenient to attach blocks and has good rigidity. There are 4 blocks installed in the profile, two of them on the same axis directly above the basket.
Then I started assembling the second part of the simulator with my own hands. First, I made a frame with height-adjustable stands for the bar, then welded the base of the lounger to it. At the other end of the base, a U-shaped profile serves as a vertical stand, on which the movable part of the simulator for training the legs and back (oars) is assembled. Both parts of the simulator are connected at the bottom. To prevent the machine from folding under load, I added a stop.
The cable passes through the basket block and goes at one end to a block with a pressure roller (this is a regular ball bearing) and is connected to a pipe that serves as a training device for the arms and trapezius. The other end of the cable goes down through the block, where the cable tensioner is installed, and then through the lower block it passes under the lounger and is connected to a device that serves as a leg and back trainer (oars).
The lounger itself is made of boards (width - “to taste”), upholstered with leatherette and foam rubber. A board made of two parts connected to each other by a one-piece door hinge, one part is fixed to the frame, and the other is movable (height adjustment). Initially, the simulator was made for the street, so it came out with such a rather large design. But, if you approach the idea creatively, then on this basis you can create a lot of smaller options.
You can also install it in the apartment for physical exercise.
DIY simulator drawings


Do-it-yourself exercise machines: photo


If you want to develop muscles, but there is no opportunity to visit the gym or purchase expensive equipment, you can make a machine with your own hands. The process requires a minimum amount of time and money, and the result will not be inferior to purchased sports equipment in terms of training efficiency. We'll talk about how to make your own gym with a set of homemade exercise equipment below.
After all, the weight of Olympic and bumper plates can be the same as that of an ordinary homemade barbell with concrete plates. But people are drawn to miracle simulators, bright colors and good advertising.
It is worth noting that nothing will work for free. You will have to spend an adequate amount of money to make equipment and training equipment.
So why do it yourself if you still have to spend money? The answer is simple, you will save on the production of exercise equipment 10 times the amount you would spend on expensive equipment.
The most essential equipment for your home gym
It is worth giving your preference to free weights. If your goals are to build a harmoniously developed, strong body, then, undoubtedly, your choice should fall on the queen of strength sports.
Exercise equipment
- Barbell. The bar can be made from a variety of materials; we will come to this issue later. For, you will need plates for the barbell, it is advisable to have them in pairs, for at least 150 kilograms. Also, the barbell set requires a W-shaped bar. This type of bar is necessary for pumping up the arms and relieving stress on the joints.
- , it is advisable that they be collapsible, as they will take up less space.
- Press Bench, preferably with an adjustable backrest. This bench is necessary for performing presses at different angles, flyes, pullovers and other exercises.
- , one of the most easily accessible exercise machines. They are distinguished by ease of manufacture and availability of materials. The range of exercises is wide, so this exercise machine will perfectly complement the gym.
- Power frame, will ensure your safety while performing squats, deadlifts and presses. A universal simulator that has a simple design and is distinguished by increased safety.
- Roller trainer, to perform various pulls. With the help of such a machine you can develop your lats and triceps well.
- For you will need punching bag and.
Here is the most necessary set for bodybuilding and maintaining physical fitness in general.
What kind of sports equipment can you make with your own hands?
If desired, we can also produce a fitness room of the latest generation, but we will produce only the most necessary equipment.
The barbell is a fairly simple exercise machine to make. For it you can use pipes and metal, and for pancakes stumps, home-made concrete pancakes, metal blanks, car flywheels and anything that can sit on our bar.
For dumbbells, you can make blanks from reinforcement and metal pipes, pancakes from plastic bottles and concrete blanks. The main condition is to make the dumbbell collapsible.
The bench is easy to make. You can make one universal, with an adjustable angle, and the other at an angle of 45, 70, 90 degrees.
The product is affordable and not expensive, but the pear will require some work. The simulator will cost some money, but will last a long time.
What is needed for production
First, let's break everything down into items and equipment.
Barbell
To make the neck, we need a metal pipe with a diameter of 30mm and a thickness of 6mm. The length of the neck should be from 1.6 m to 2 m.
Separators, which will separate the working surface for gripping and the place for the pancakes. For the dividers we will need 2 strong bolts or cut out 2 pieces of metal plate with a diameter of 50 mm. We drill out the center of the plates by 30mm, and we have ready-made separators; all that remains is to weld them onto the pipe.
Neck locks. They are useful for firmly fixing the weights on the barbell. You can purchase 2 spring locks or take 2 pieces of pipe with a diameter of 31 mm and drill a hole in them and secure them with a bolt.
Pancakes. To make pancakes, we will need to make a mold from boards and metal. For filling we will use high-grade concrete and reinforce it with wire.
To make the construction of the pancakes more durable and more beautiful, you will need to cover the pancakes with concrete enamel, this will provide protection from moisture, and concrete dust will not fall off them.
Dumbbells
To make dumbbells we will need: 2 pieces of pipe, pancake molds, locks. The manufacturing technology is the same as that of the barbell. It is advisable to do everything at once.
For the bench we will need: a metal square, dimensions 50x50x4. The length is only about 8.3 meters. Board dimensions 1.3 by 0.3 m. It will be needed for the base.
metal plate, for making petals. They are installed on the bench posts and serve as holders for the barbell.
To make a functional station that will contain a horizontal bar and bars, we will need metal for the base and pipes for the crossbars. Concrete for pouring the structure. Provided that the station will be installed on the street. It is also worth welding the crossbar at a height for attaching gymnastic rings and a punching bag.
Power frame, the design is complex and requires the use of precise drawings and a large amount of materials. So it should be dealt with separately.
Punching bag
To make a punching bag, you will need either regular bags for storing cereals, or tarpaulin or tarpaulin. Dimensions for manufacturing - height at least 1 meter, weight must be taken into account from 40 to 60 kg. 2 metal rings that will give shape to the punching bag, 4 carabiners, a meter of chain and the padding itself. You can use rags, old things and sawdust as padding.
Also, in addition to everything, you should have a welding machine and all accessories for it, cement, sand, crushed stone and a thinking head that will be responsible for the manufacturing process
Description of the manufacturing process, step-by-step instructions
Barbell
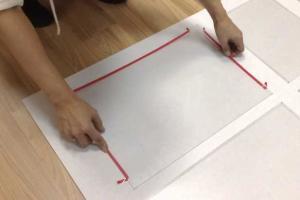
- To make a barbell, we first make blanks for pancakes, cut them out and knock together a circle shape from boards. We measure the middle and insert a piece of pipe with a diameter of 32 mm. We get a centered base. We trim the edges with tin and connect it with self-tapping screws. The form is ready. We make forms using the same principle for dumbbells. You can adjust the dimensions of the mold yourself, keep in mind that the larger the pancake, the heavier it will be.
- Now we need to make a frame that will firmly hold our concrete. This frame is knitted from wire and placed on the bottom of the mold.
- To prepare durable high-grade concrete, we must mix 1 bag of high-grade cement, 2 bags of crushed stone and one and a half bags of sand. All this is diluted with water until a uniform mass is obtained and placed in molds. We smooth out all the unevenness with a spatula and lay another layer of wire. Be sure to tread and compact the concrete base to avoid the formation of cavities in the pancakes. Leave the molds until the solution dries completely. On average it will take 3 days.
- After the concrete solution has dried, carefully remove the pancakes from the molds; this must be done very carefully, if they do not come out, carefully beat the edges of the molds with a hammer and the pancakes can be taken out. Cover the finished pancakes with concrete paint and leave to dry.
- Let's start making the necks. We will make 2 of them, one is a classic bench press, the second will be W-shaped. For a classic bar, we take our blank, grind it so that it is smooth and comfortable. After grinding, using a welding machine, we weld the holders at a distance of 40 cm from the edges. We will use bolts as locks. Then we drill 4 holes on these 40 cm for installing locks.
- To make a W-shaped neck, we take a blank pipe, We clamp it in a vice and evenly bend the middle to a W shape. For space for the pancakes, we retreat 20 cm and weld the holders.
Dumbbells
The design of dumbbell bars is made according to the same principle as a classic bar.

Press Bench
The bench press will have a more complex design.
We take our raw material, in the form of a square metal pipe, and make blanks from it. We need to consider the design and dimensions. Our piece is completely enough for manufacturing, and the drawing itself can be found on the Internet.

Punching bag
For the punching bag we need to choose the material. The best choice remains canvas fabric. If you don’t have the opportunity and skills to sew a bag yourself, then it’s better to take it to a tailor shop. It should be warned that the upper ring is not sewn in completely, but rather that 4 gaps 1 cm long are placed. Carabiners will be placed on these gaps.
After the bag is ready, you need to start stuffing it. The density is determined for each person individually, but if you are new to the sport, then you should not fill the bag tightly in order to avoid injuries and allow your hands to get used to it.

Summarizing
At the end of all the work, we get a set for developing strength, namely a barbell, a W-shaped bar, a pair of dumbbells, a bench and a pear.
According to the period of use, the pancakes will last for at least 2 years, the pear, if properly cared for and not exposed to a humid environment, will last about 5 years. The bars and bench are forever.
Comparison of the cost of the materials used and the cost of purchasing a new simulator
As a result, we spent about 10 thousand rubles on all the material, provided that we use only high-quality materials.
Now let’s look at the average prices for new inventory:
- Olympic barbell with a set of weights for 120 kg. Rubber protection will cost you about 50 thousand rubles.
- The price for a pair of dumbbells of 20 kg is 15,000 rubles.
- The average price of a bench press is from 5 thousand.
- Punching bag from 3.5 thousand. As a result, we save more than 70 thousand rubles.
Difficulty of manufacturing
The complexity of making such simulators depends on your abilities and imagination. If you have a significant lack of skills, you can use the services of professionals. According to calculations, this could cost approximately another 10 thousand rubles, but when compared with the amount for branded equipment, you will still be able to save in the end. But if you still decide to do everything yourself, you will receive a set of useful skills that will be useful in the future for expanding the gym.
Safety of use
It is worth noting that you can get injured even with the most modern exercise equipment. It is worth remembering the golden rule of bodybuilding “There should be moderation in everything,” which means, carefully work on the technique, and the weight of the burden will gradually increase on its own. Therefore, the likelihood of getting injured depends primarily on you.